
User Guide of Leawo PowerPoint to iPad
How to Convert a PowerPoint Presentation/Slideshow to iPad Video with Leawo PowerPoint to iPad?
Leawo PowerPoint to iPad is a professional tool that enables you to convert a PowerPoint presentation to any popular format of video suitable for iPad, as well as iPhone and iPod Touch. It holds a multi-lingual UI and robust codec that can help create various formats of video from a PPT file, yet without any loss of original animations, sounds, transitions, movie clips or hyperlinks. Hence, it offers a cinch for you to share a compelling PowerPoint presentation online and view it at your devices created by Apple.
This guide covers four steps for converting your PowerPoint file(s) to high quality video. Follow the instructions below to get a quick idea of how to make video slideshow using Leawo PowerPoint to iPad.
Step 1 Launch the program and import PPT files
Install and launch Leawo PowerPoint to iPad on your computer.
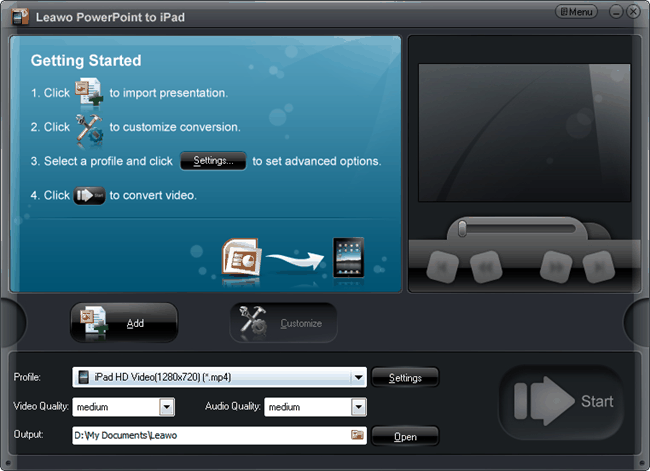
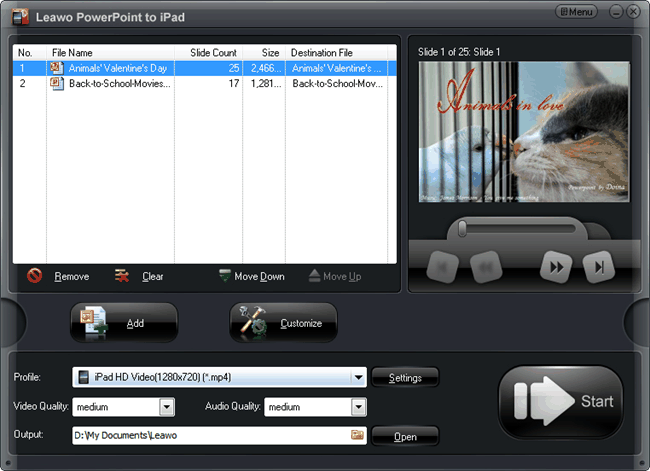
Hit the Add icon to import a PPT file you would like to convert. You can add up to 12 PowerPoint files at a time.
Step 2 Customize conversion parameters for the output video
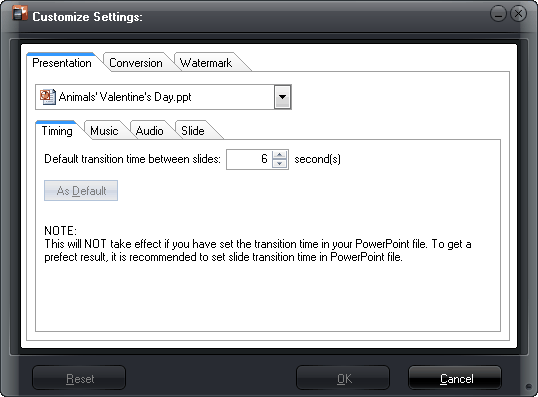
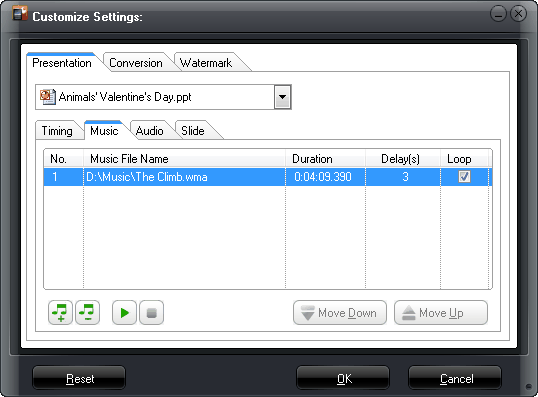
To modify conversion settings for a selected PPT file, click on the Customize icon to enter the Customize interface.You will see three tabs: Presentation, Conversion and Watermark and under Presentation there are four sub-tabs: Timing, Music, Audio and Slide.
a. Set transition Timing between slides, ranging from 0-100 second(s).
b. Toggle to the Music pane to add a sound for the output video. Click the Play icon to check the playback effect.
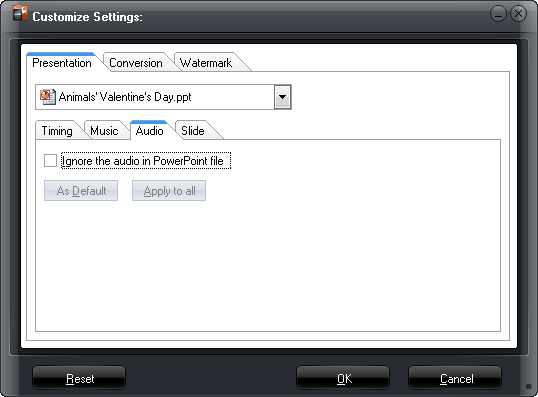
c. Switch to the Audio pane. To ignore the audio file from selected PowerPoint presentation, check the "Ignore..."option.
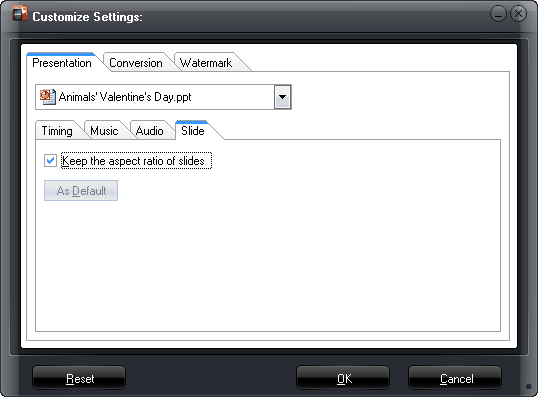
d. Click on the Slide pane. Check the box to keep the aspect ratio of slides. Otherwise, uncheck it.
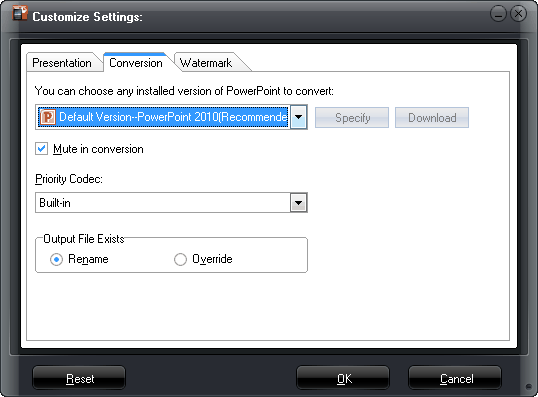
e. Turn to the Conversion pane. To make the conversion silent, tick the "Mute in conversion" checkbox. If you want one with sound, uncheck it. Choose to rename or override the output file if another file with the same name exists.
f. Click Watermark tab and jump to the Logo & Video Layout interface.
Add logo(s)
![]()
Add logo file(s): Click ![]() to add an image from your hard drive. Then you can see the image on the preview panel. You can drag to place it anywhere within the panel or drag its border to zoom in or out.
to add an image from your hard drive. Then you can see the image on the preview panel. You can drag to place it anywhere within the panel or drag its border to zoom in or out.
Alpha: Drag the slider to set an alpha value for the logo you've added.
Enable Transparent Color (This function enables you to remove all pixels of a certain color from the image.)
Set the color that you want to remove: click ![]() to select a color or click
to select a color or click ![]() to select a color from the selected image:
to select a color from the selected image:

Tolerance: Drag to set a value of tolerance, i.e. to clear relative pixels of the selected image.
Set video layout

Margin Size: Drag the slider to set the margin size.
Margin Fill: Three methods are offered to fill the margin.
Method 1: Pick a picture from the template base.
Method 2: Adjust the colors. You can adjust the current angle and position of the margin via the cross fades of three different colors.
Method 3 Take an image from your local drive.
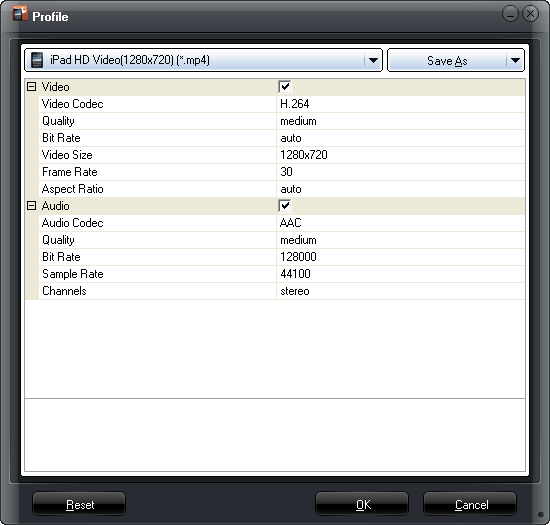
Step 3 Select a profile and make advanced settingsIn the Profile interface, set specific parameters for the output video or audio as you need.
Step 4 Start converting PowerPoint to video
Go back to the main panel, and click Start in to trigger the conversion of your PowerPoint presentation.
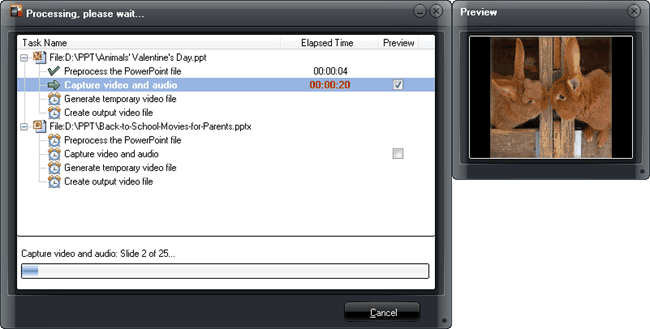
You will see the overall progress listed on a Task Pane. Check the Preview box so that you can watch the output video realptime during the conversion process. The Elapsed time shows how much time has gone since the beginning of the conversion process for each PPT file. To cancel the process, press the Cancel button.
After conversion, click Finish to exit the interface and view your video slideshow(s) from the specified output folder.

 Products List
- Video Tools
- Total Media Converter Ultimate
- Video Converter Ultimate/Pro

- Video Converter
- Blu-ray Creator
- DVD Creator
- iTransfer
- Music Recorder

- Video Accelerator
- PowerPoint Tools
- PowerPoint to DVD Pro
- PowerPoint to DVD Standard
- PowerPoint to Video Pro
- PowerPoint to FLV
- PowerPoint to YouTube
- PowerPoint to iPad
- Blu-ray/DVD Tools
- Blu-ray Video Converter
- Blu-ray Copy
- Blu-ray Ripper
- Blu-ray Player
- Blu-ray to MKV Converter
- DVD Ripper
- DVD Copy
- Utilities
- iOS Data Recovery
- iOS Data Recovery for Mac
- Tunes Cleaner
- Tunes Cleaner for Mac
- SWF Encrypt
- SWF Encrypt for Mac
- Mac Video Tools
- Video Converter Pro for Mac
- Video Converter for Mac
- Blu-ray Creator for Mac
- DVD Creator for Mac
- iTransfer for Mac
- Music Recorder for Mac
- YouTube Downloader for Mac
- iAm Ringer for Mac
- Mac Blu-ray/DVD Tools
- Blu-ray Ripper for Mac
- Blu-ray Copy for Mac
- Blu-ray Player for Mac
- Blu-ray to MKV Converter for Mac
- DVD Ripper for Mac
- DVD Copy for Mac
with the good work.
From Jay Burt
I was lucky that my search words matched your website offering. I may recommend to
my friends about you.
From Rajesh Madhawarayan