
Tutorial of Leawo iPhone Converter Pro
Tutorial of use Leawo iPhone Converter Pro:
Before converting video to iPhone, please choose to download and install Leawo iPhone Converter Pro!
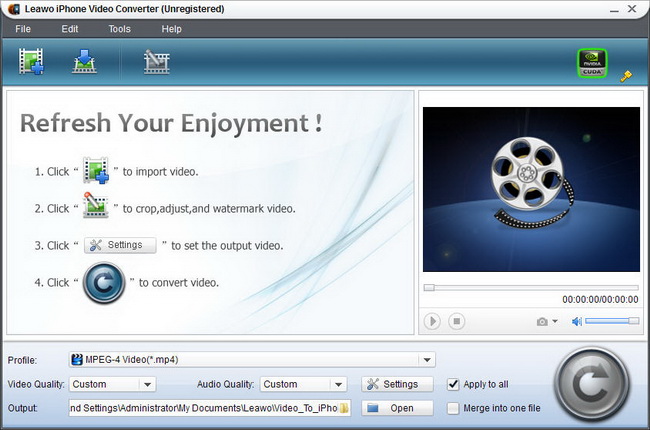
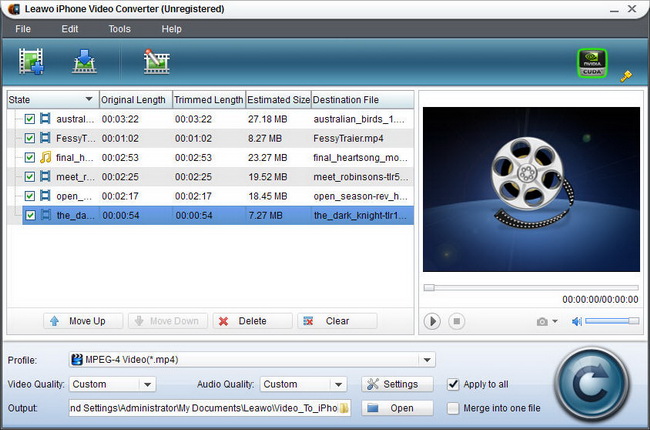
Step 1: Add video.
Click “![]() ” to add video file to the program.
” to add video file to the program.
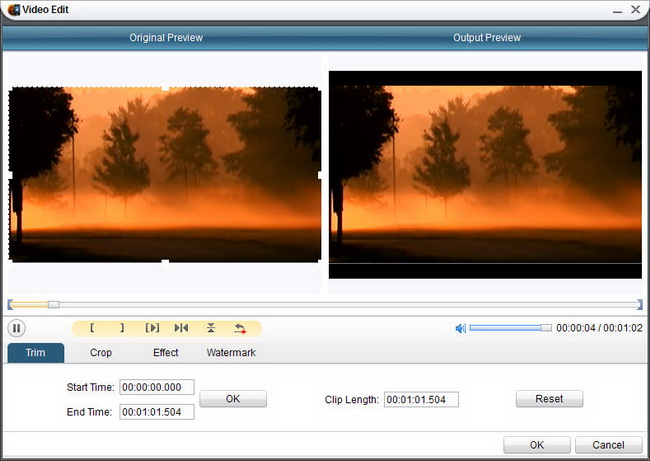
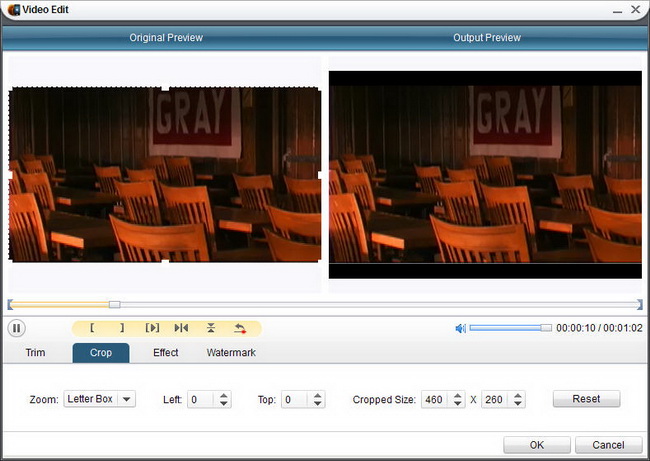
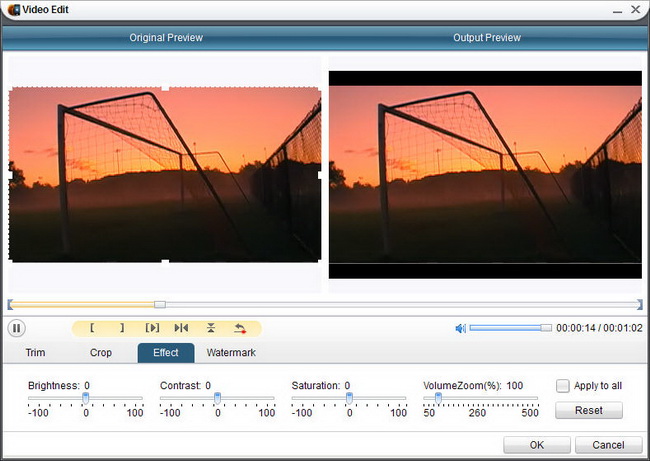
Step 2: Customize effects. (This function is only available in ![]() version!)
version!)
Click “![]() ” to open the “Video Edit” window. Then you can customize the output audio and video:
” to open the “Video Edit” window. Then you can customize the output audio and video:
Trim: Trim video duration time to cut the unnecessary part of video to enjoy the wonderful segments.
Crop: Crop video edge to extract the black margins.
Effect: Set video brightness, video contrast, video saturation and audio volume.
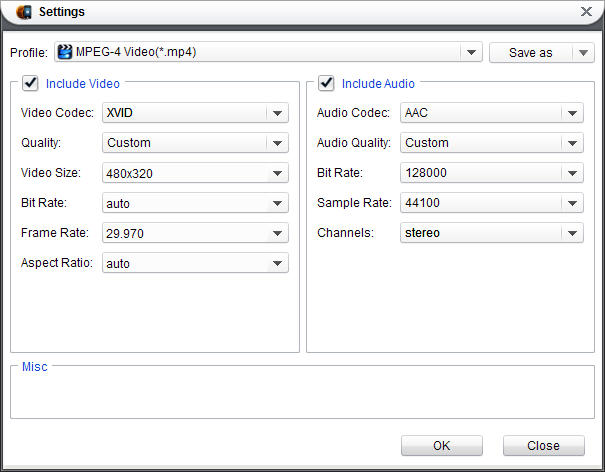
Step 3: Settings. (The following (2) and (3) functions are only available in ![]() version!)
version!)
(1) Click drop-down button behind “Profile” on the main interface to specify a format as your output format: iPhone MP4, iPhone 4 MP4, common MP4, MOV, or audio file.
(2) Click drop-down buttons behind “Video Quality” and “Audio Quality” on the main interface to find the suitable quality for your output.
(3) Click “Settings” to open the “Settings” interface to make detailed settings for output audio and video, such as audio and video codec, quality, bit rate, video frame rate, video size, audio sample rate, etc.
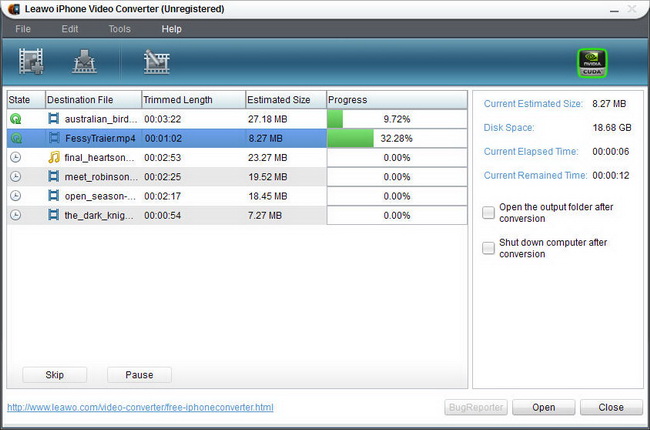
Step 4: Convert.
After completing settings, click “ ” to start video to iPhone, iPod, Apple TV, or audio file conversion.
How to transfer video to iPhone player?
Step1: You may want to set the iPhone not to sync automatically to iTunes as this could give you too much information at once. Then you can pick and choose what you want to put into it manually. You can also set iTunes not to sync with all iPhones, so you can do your separate loading with minimal problems!
Step2: To set it up to not sync automatically, connect it to your computer and in iTunes click the Summary tab. Then un-check “Automatically Sync when this iPhone is connected.” This stops iTunes from coming up when you connect iPhone. You can still start sync manually.
Step3: To Set it up to not sync for all iPhones, in iTunes choose iTunes then Preferences (on a Mac) or Edit then Preferences (on a PC), then un-check “Disable automatic syncing for all iPhones.”
If this checkbox is selected, iPhone won’t sync automatically, even if “Automatically sync”is selected in the Summary pane.
Step 4: OK, now you're ready! Click the Summary tab, and then click Sync in the lower-right corner of the window. Or, if you’ve changed any sync settings, click Apply.
Step 5: Now go to the 'Music' pane. You can sync it to grab it all, or select your personal playlists and/or podcasts. It will load up and be ready to go! Anything Audio such as music video's or audiobooks will load here.
Step6: Next go to the 'Video' pane. Same thing, pick and choose or load them all up!
Step7: If you want to carry your photo albums, it is as simple as going to the 'Photo' pane and bringing them over as well. This is when you would need iPhoto 4.0.3 or later on a Mac, or with Adobe Photoshop Album 2.0 or later or Adobe Photoshop Elements 3.0 or later on a PC. If you have them formatted in a folder already that is not needed, just pull them over.
Step8: Enjoy, but try to remember that other people may not like your choice of music (or just do not want to listen to any music) and if you NEED to blast it, get good headphones, you can afford it since you can afford this phone, haha!
 Products List
- Video Tools
- Total Media Converter Ultimate
- Video Converter Ultimate/Pro

- Video Converter
- Blu-ray Creator
- DVD Creator
- iTransfer
- Music Recorder

- Video Accelerator
- PowerPoint Tools
- PowerPoint to DVD Pro
- PowerPoint to DVD Standard
- PowerPoint to Video Pro
- PowerPoint to FLV
- PowerPoint to YouTube
- PowerPoint to iPad
- Blu-ray/DVD Tools
- Blu-ray Video Converter
- Blu-ray Copy
- Blu-ray Ripper
- Blu-ray Player
- Blu-ray to MKV Converter
- DVD Ripper
- DVD Copy
- Utilities
- iOS Data Recovery
- iOS Data Recovery for Mac
- Tunes Cleaner
- Tunes Cleaner for Mac
- SWF Encrypt
- SWF Encrypt for Mac
- Mac Video Tools
- Video Converter Pro for Mac
- Video Converter for Mac
- Blu-ray Creator for Mac
- DVD Creator for Mac
- iTransfer for Mac
- Music Recorder for Mac
- YouTube Downloader for Mac
- iAm Ringer for Mac
- Mac Blu-ray/DVD Tools
- Blu-ray Ripper for Mac
- Blu-ray Copy for Mac
- Blu-ray Player for Mac
- Blu-ray to MKV Converter for Mac
- DVD Ripper for Mac
- DVD Copy for Mac
with the good work.
From Jay Burt
I was lucky that my search words matched your website offering. I may recommend to
my friends about you.
From Rajesh Madhawarayan