
iOS Data Recovery User Guide
Leawo iOS Data Recovery is an all-in-one data recovery to recover data from iOS devices. To achieve iPhone data recovery, iPad data recovery and iPod touch data recovery quickly and completely, the multifunctional iOS data recovery tool is undoubtedly the prior choice for you. With it, you can recover 12 types of data including lost photos, videos, contacts, messages and many more from iTunes backup and 7 kinds of files directly from iPhone/iPad/iPod touch devices.
Learn how to recover data from iPhone/iPad/iPod by referring to Leawo iOS data recovery user guide shown as below.
Part 1 Recover directly from your iOS device (iPhone/iPad/iPod touch)
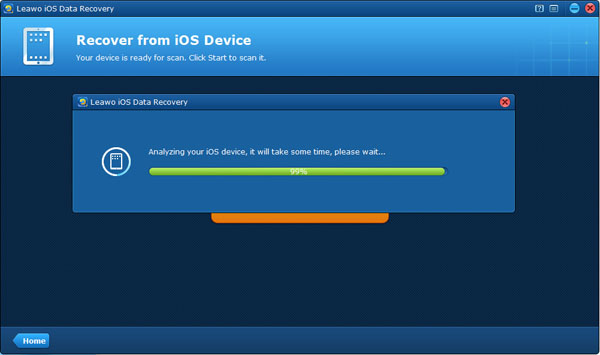
Step 1: Start scanning your device
After connecting your iOS device and launching Leawo iOS Data Recovery, you are automatically put into "Recover from iOS device" mode. Click "Start" to begin scanning your iPhone/iPad/iPod touch. Then wait patiently for the automatic scanning of your device for just a few minutes.
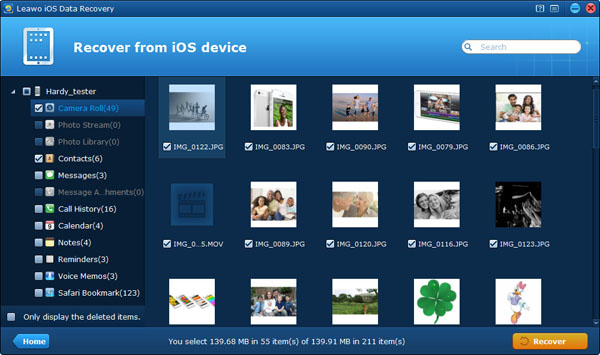
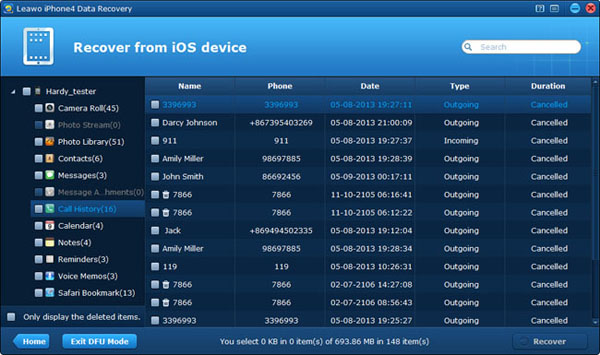
Step 2: Preview data found in the scanning
After scanning, you can preview the different categories and specific files on your iOS device one by one. To recover data from iPhone/iPad/iPod touch, you should tick the targeted files.
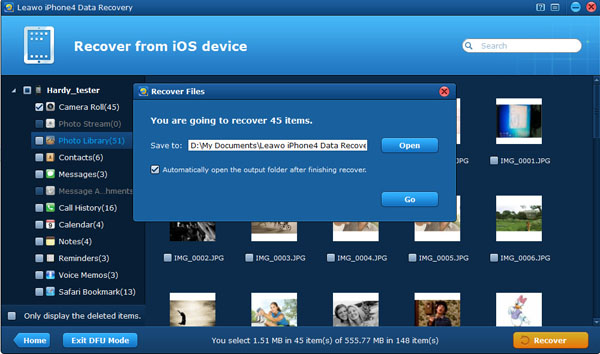
Step 3: Recover and save files
Last but also the most key step, click "Recover" button, then select a file directory on your PC to save the data to be output.
Part 2 Recover from iTunes backup without connecting the device
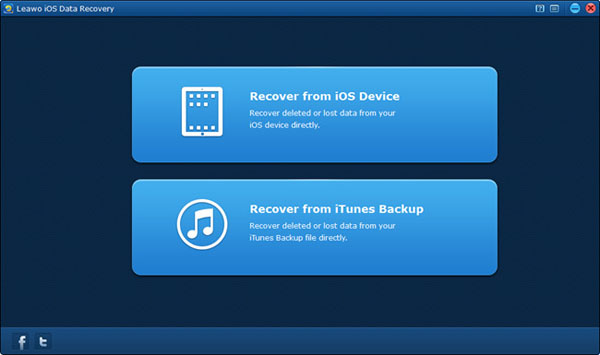
Step 1: Enter "Recover from iTunes backup" mode
You can achieve iPhone/iPad/iPod touch data recovery by selecting the second "Recover from iTunes backup" mode after launching the program.
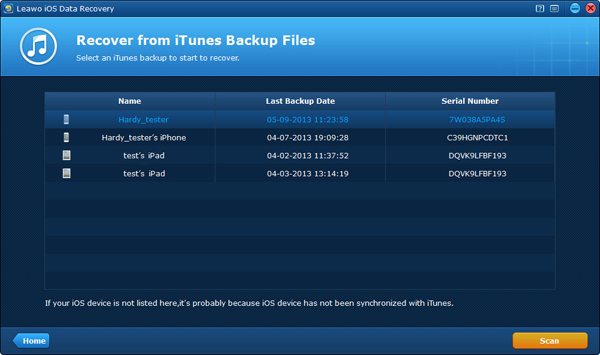
Step 2: Select an iTunes backup to scan
Then select one backup from the listed devices and click "Scan" to extract iTunes backup stored on your local computer.
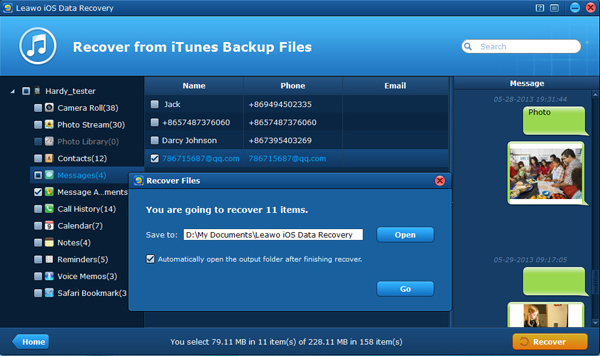
Step 3: Preview and recover data found
Now you can preview the files in your iTunes backup first and then tick the specific items to recover. After clicking "Recover" button, you should choose a saving location on your PC to store the files to be output.
Part 3 Recover by deeply scanning your device under DFU recovery mode
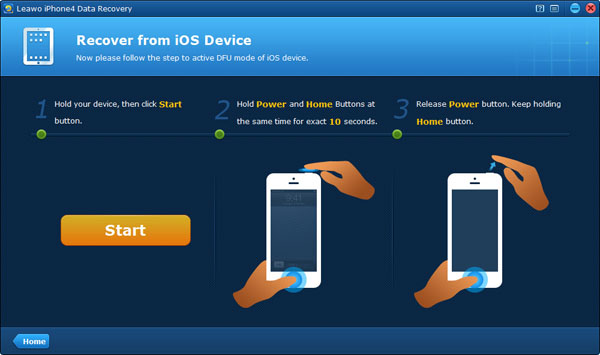
Step 1: Activate DFU mode on your iOS device
Firstly, you should connect your device with the computer, and launch the program, then activate the DFU mode on your device by referring to the 3-step guide shown on the program interface.
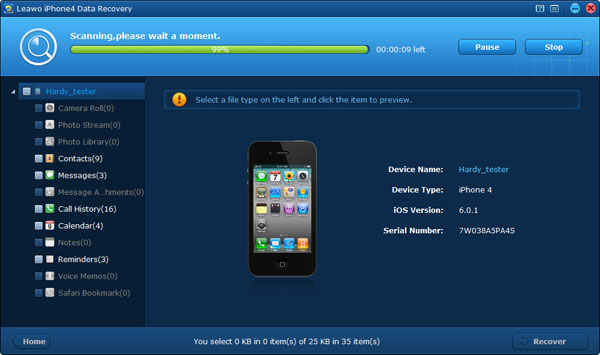
Step 2: Deeply scan and analyze your device
When you have entered DFU mode of your device successfully, just wait for the automatic scanning and analyzing of your device. It may take a bit longer time for the scan if there are a whole bunch of data on your device.
Step 3: Preview and recover files found in the scanning
Now you can select some categories or single files to preview, and tick the ones you want to recover from your device, then click "Recover" button and choose an output file location to start iPhone/iPad/iPod touch data recovery.

 Products List
- Video Tools
- Total Media Converter Ultimate
- Video Converter Ultimate/Pro

- Video Converter
- Blu-ray Creator
- DVD Creator
- iTransfer
- Music Recorder

- Video Accelerator
- PowerPoint Tools
- PowerPoint to DVD Pro
- PowerPoint to DVD Standard
- PowerPoint to Video Pro
- PowerPoint to FLV
- PowerPoint to YouTube
- PowerPoint to iPad
- Blu-ray/DVD Tools
- Blu-ray Video Converter
- Blu-ray Copy
- Blu-ray Ripper
- Blu-ray Player
- Blu-ray to MKV Converter
- DVD Ripper
- DVD Copy
- Utilities
- iOS Data Recovery
- iOS Data Recovery for Mac
- Tunes Cleaner
- Tunes Cleaner for Mac
- SWF Encrypt
- SWF Encrypt for Mac
- Mac Video Tools
- Video Converter Pro for Mac
- Video Converter for Mac
- Blu-ray Creator for Mac
- DVD Creator for Mac
- iTransfer for Mac
- Music Recorder for Mac
- YouTube Downloader for Mac
- iAm Ringer for Mac
- Mac Blu-ray/DVD Tools
- Blu-ray Ripper for Mac
- Blu-ray Copy for Mac
- Blu-ray Player for Mac
- Blu-ray to MKV Converter for Mac
- DVD Ripper for Mac
- DVD Copy for Mac
with the good work.
From Jay Burt
I was lucky that my search words matched your website offering. I may recommend to
my friends about you.
From Rajesh Madhawarayan