
Leawo iOS Data Recovery for Mac User Guide
Leawo iOS Data Recovery for Mac is easy-to-use and multifunctional recovery software for all Mac users. This recovery software works well with the latest iOS 7, and support all kinds of iOS devices, including the latest iPhone 5s, iPhone 5c, iPad Air and iPad mini with Retina Display. This iPhone data recovery software for Mac enables users to recover up to 12 kinds of most important files effortlessly, including contacts, messages, call history and so on.
Leawo iOS Data Recovery helps to recover and export files of different format from iOS devices and iTunes backups. The software has a very friendly UI which can be handled by the users quickly. The software provides 3 ways to recover lost data, including recovering data from iTunes backup, recovering data from iOS devices, and recovering data under DFU mode. The following guidance will introduce the three ways in detail.
Part 1 How to Recover Data from iTunes Backup
Compatible Devices: iPhone 5s, iPhone 5c, iPhone 5, iPhone 4s, iPhone 4, iPhone 3GS, iPad Air, iPad 4, iPad 3, iPad 2, iPad, iPad mini with Retina Display (iPad mini 2), iPod touch 5 and iPod touch 4.
Recoverable Files: Camera Roll, Photo Stream, Photo Library, Contacts, Messages (MMS, SMS, iMessages), Message Attachments, Voice Memos, Call History, Calendar, Notes, Reminders and Safari Bookmarks.
Step 1: Run Leawo iOS Data Recovery for Mac
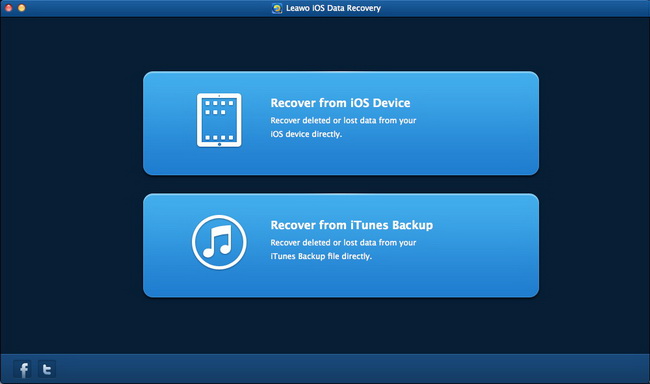
Run the software after installing it on MacBook. The software will ask whether you want to recover files from iOS device or recover files from iTunes backup. Click “Recover from iTunes Backup” and a quick scan will start.
Step 2: Choose a Backup and Select Files
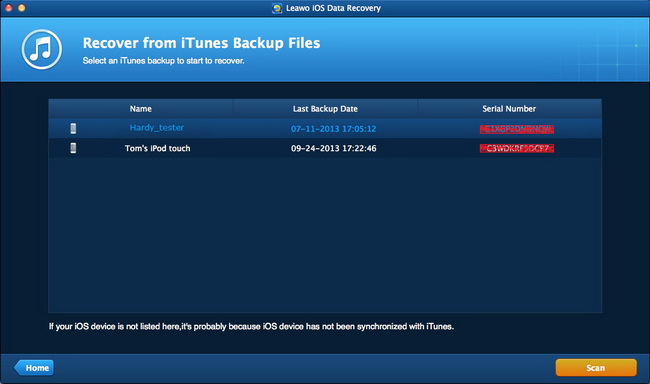
After the quick scan, the software shows up all the backups of your iTunes in the window. Choose one backup of iTunes, and then click “Scan” button at the right bottom of the window. The software will start a deep scan of the backup.
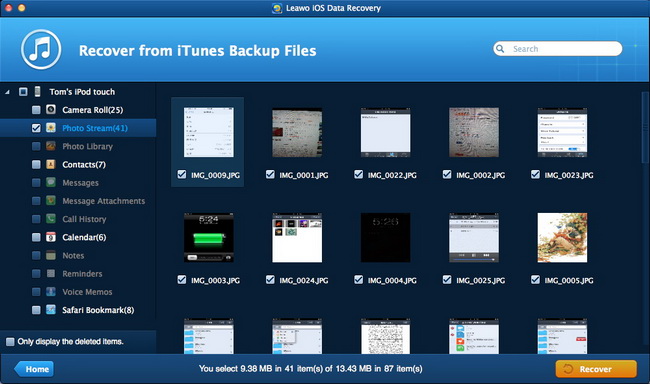
After the deep scan, the categories of files that you can backup will show up in the left sidebar. Check one category or certain files in the category to recover.
Step 3: Choose Folder to Save the Exported Files
After choosing files, click “Recover” button at the right bottom of the window and then the dialog pops up. Click “Open” in the dialog to select a folder to put the exported files. Then click “Go” at the right bottom of the dialog to start the recovery. You are also able to make the target folder pop up after the recovery by checking “Automatically open the output folder after finishing recover”.

Step 4: Recovering Files from iTunes Backup
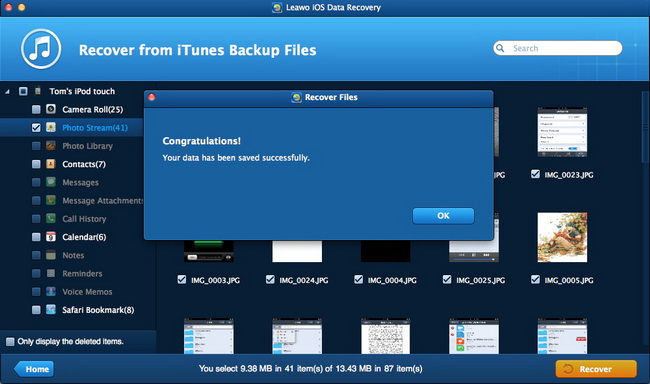
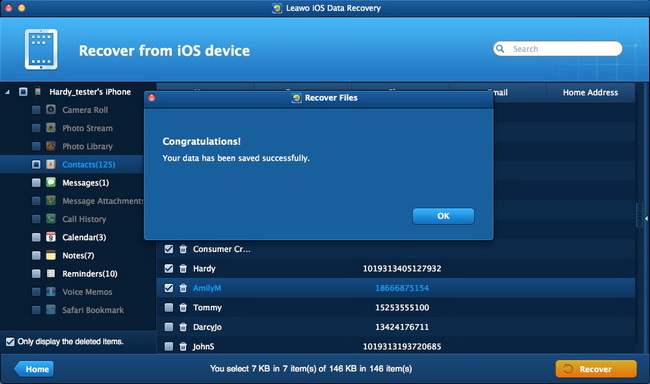
The recovery starts immediately after clicking “Go”. A dialog shows up and the progress bar in the dialog will notice the percentage of the recovery process. When the recovery process is done, the target folder that you have chosen to save recovered files will pop up automatically. Then you are able to manage the files with ease.
Part 2 How to Recover Lost Files from iOS Device
Compatible Devices: iPhone 5s, iPhone 5c, iPhone 5, iPhone 4s, iPhone 4, iPhone 3GS, iPad Air, iPad 4, iPad 3, iPad 2, iPad, iPad mini with Retina Display (iPad mini 2), iPod touch 5 and iPod touch 4.
Recoverable Files: Contacts, Messages (MMS, SMS, iMessages), Call History, Calendar, Notes and Reminders.
Step 1: Run the Software and Connect the iDevice
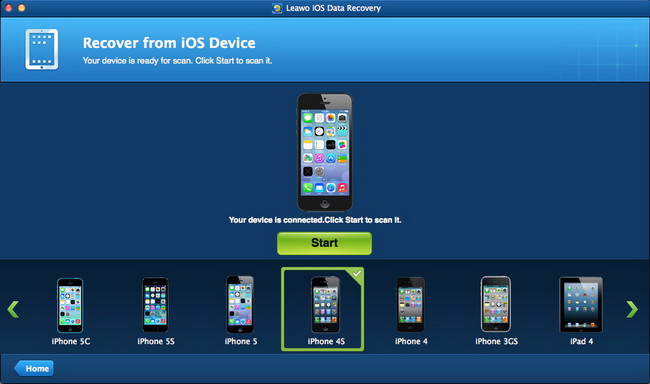
1.1 Run Leawo iOS Data Recovery for Mac after installing it on the MacBook. Choose “Recover from iOS Device” when the software asks. Then connect the iOS device to MacBook with the USB cable. The software will recognize your iOS device.
1.2 Plug your iOS device into the MacBook via the USB cable. Then launch Leawo iOS Data Recovery for Mac. The software will detect and recognize your iOS device.
1.3 If you use iPhone 4 or iPod touch 4, and find that the software cannot recognize your iDevice after you plug it into the MacBook via the USB cable. Then please refer to Part 3. How to Recover Files Under DFU Mode for some help.
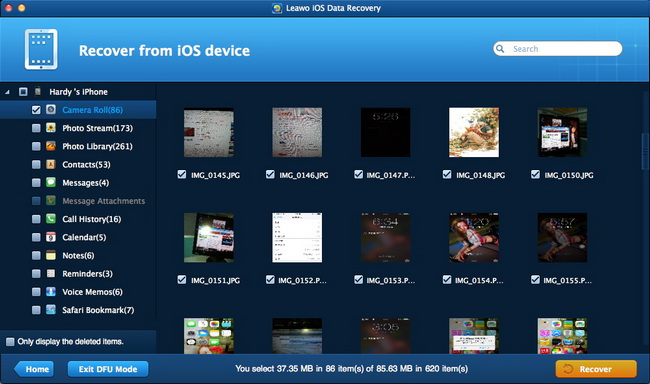
Step 2: Select Files to Recover
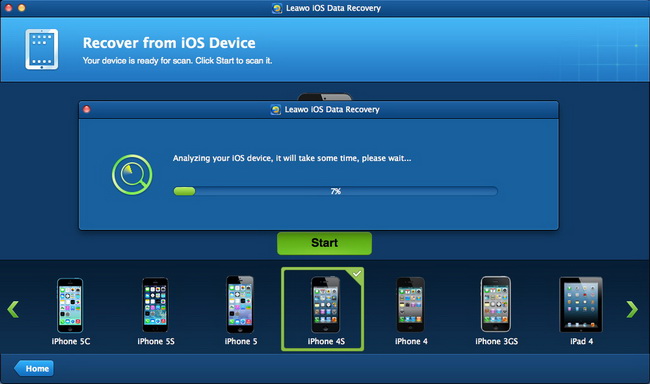
After the software recognizes your iOS device, it will start a deep scan for your iOS device.
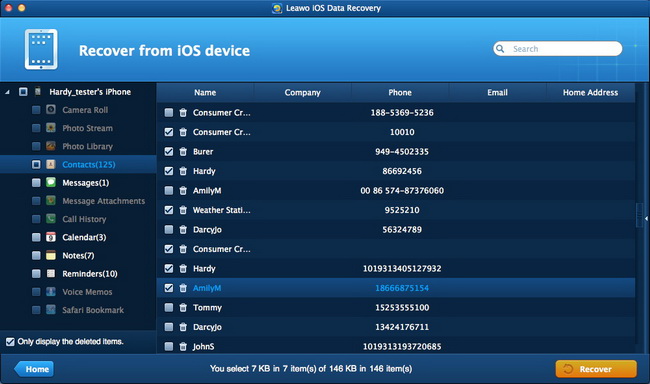
After the scan, the software will show the categories of files in the left sidebar of the window. Check a category or certain files to recover. Then click “Recover” at the right bottom of the window.
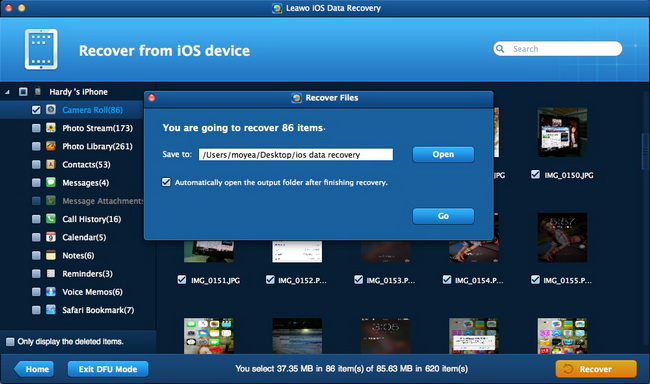
Step 3: Choose Target Folder and Start Recovery
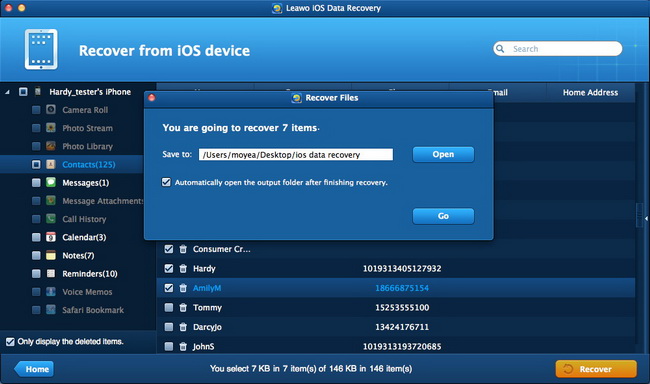
A dialog will pop up after clicking “Recover” button. Click “Open” in the dialog to choose a folder to save the exported files. You are able to make the target folder pop up after the recovery by checking “Automatically open the output folder after finishing recover”. Then click “Go” to start the recovery.
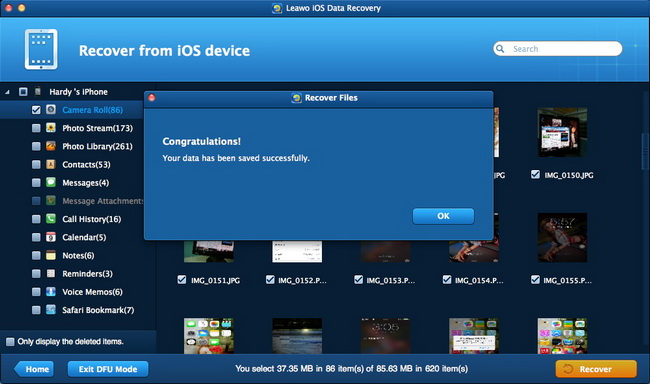
When the recovery of the lost files in done, the target folder will pop up and the recovered files will be shown in the target folder.
Part 3 How to Recover Files Under DFU Mode (iPhone 4 and iPod touch 4 Only)
Compatible Devices: iPhone 4 and iPod touch 4
Recoverable Files: Contacts, Messages (MMS, SMS, iMessages), Call History, Calendar, Notes and Reminders.
Step 1: Run the Software and Connect the iOS Device
Run Leawo iOS Data Recovery for Mac after installing it on MacBook. Then connect the iOS device to MacBook with the USB cable. The software will show a tutorial for activating DFU mode on your iOS device.
1. Click “Start” button in the window and then hold the power button and Home button on your iPhone for 10 seconds. The count-down time shows up in the window.
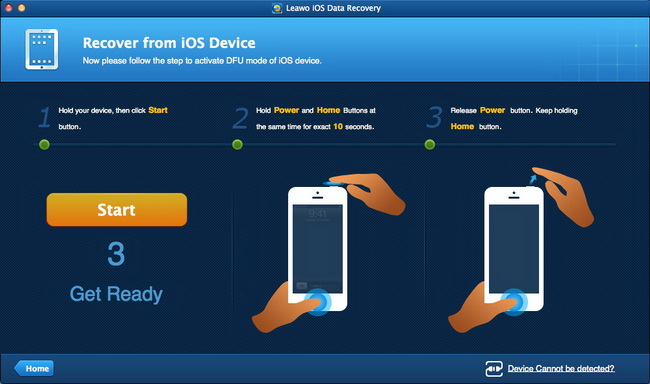
2. After 10 seconds, the screen of your iOS device turns black. Release the power button and keep holding the Home button for another 10 seconds until the message “You have successfully entered DFU mode, now you can release the Home button” shows on the window of the software.
Step 2: Select Files
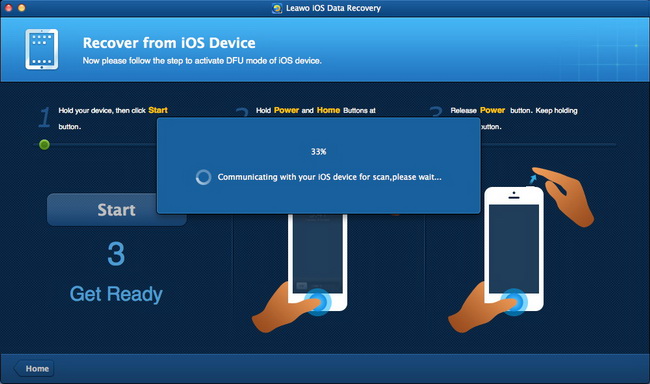
After activating the DFU mode on your iOS device, the software will automatically start the dep scan of the iOS device.
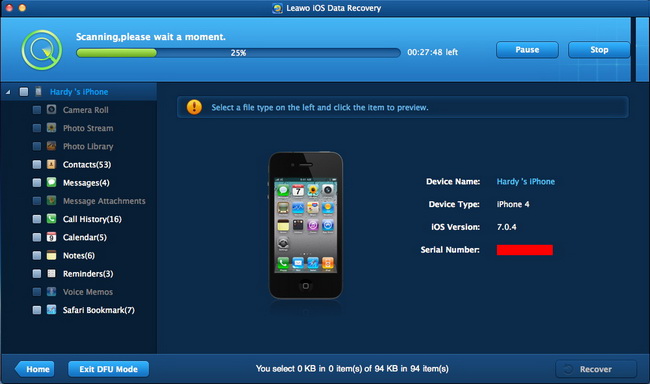
The scan may take a while, and after the scan, the categories of files that you are able to recover will be shown in the left sidebar. Check the category or certain files in the category to recover.
Step 3: Choose a Target Folder to Save the Files
After choosing files, click “Recover” and a dialog will pop up. Click “Open” in the dialog to choose a folder on your MacBook to save the exported files. Check “Automatically open the output folder after finishing recover”, and then the target folder you choose to save the files will pop up after the recovery. Click “Go” at the right bottom of the window to start the recovery.
Step 4: Recovering Files
When the recovery starts, a dialog of the recovery process will pop up. The progress bar in the dialog will show the percentage of the recovery process. When the recovery is done, the target folder will pop up, and you can manage the recovered files.

 Products List
- Video Tools
- Total Media Converter Ultimate
- Video Converter Ultimate/Pro

- Video Converter
- Blu-ray Creator
- DVD Creator
- iTransfer
- Music Recorder

- Video Accelerator
- PowerPoint Tools
- PowerPoint to DVD Pro
- PowerPoint to DVD Standard
- PowerPoint to Video Pro
- PowerPoint to FLV
- PowerPoint to YouTube
- PowerPoint to iPad
- Blu-ray/DVD Tools
- Blu-ray Video Converter
- Blu-ray Copy
- Blu-ray Ripper
- Blu-ray Player
- Blu-ray to MKV Converter
- DVD Ripper
- DVD Copy
- Utilities
- iOS Data Recovery
- iOS Data Recovery for Mac
- Tunes Cleaner
- Tunes Cleaner for Mac
- SWF Encrypt
- SWF Encrypt for Mac
- Mac Video Tools
- Video Converter Pro for Mac
- Video Converter for Mac
- Blu-ray Creator for Mac
- DVD Creator for Mac
- iTransfer for Mac
- Music Recorder for Mac
- YouTube Downloader for Mac
- iAm Ringer for Mac
- Mac Blu-ray/DVD Tools
- Blu-ray Ripper for Mac
- Blu-ray Copy for Mac
- Blu-ray Player for Mac
- Blu-ray to MKV Converter for Mac
- DVD Ripper for Mac
- DVD Copy for Mac
with the good work.
From Jay Burt
I was lucky that my search words matched your website offering. I may recommend to
my friends about you.
From Rajesh Madhawarayan